
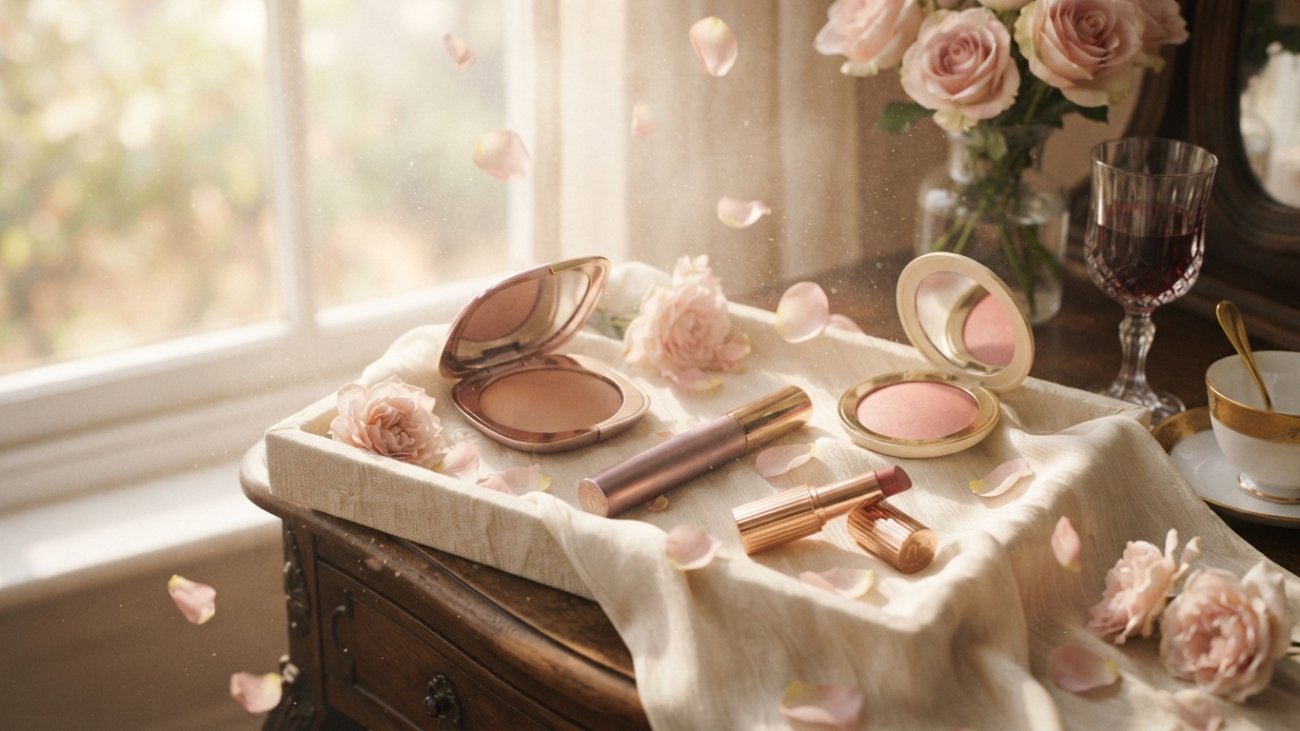
Lip colour, mascara, compact powder and blush on cream silk with rose petals, makeup starter kit for beginners

Makeup Starter Kit

Quick answer: A makeup starter kit needs only five items: a lip colour, mascara, a face powder, a blush and a concealer. Buy the forgiving ones first, add shade-sensitive base products last, and skip big palettes. Test each product on a small patch of skin before using it on your face.

Most beginner makeup kits fail for one reason. They’re bought as a set, not as a plan. Twenty products arrive, three get used, and the rest slowly expire in a drawer.

This guide takes the opposite approach. You’ll buy five things, in three rounds, in the order that carries the least risk when you shop on your phone.

What belongs in a makeup starter kit?

Think in functions, not trends. A beginner needs colour for the lips, definition for the eyes, a little colour on the cheeks, something to calm shine, and something to even out skin if you want it. That’s five items.

ItemWhy it earns a placeWhat to check before buying
Lip colourThe quickest finish for the least skillChoose a shade close to your natural lip colour first
MascaraOne coat opens up the eyesCheck the seal and batch or date details on the pack
Face powderReduces shine, which helps in sticky weatherChoose a translucent shade or one very close to your skin
BlushAdds colour to the faceA soft shade is easier to blend than a bold one
ConcealerEvens out dark spots or shadowsThe most shade-sensitive item, so buy it last

Notice what’s missing. There’s no foundation, no palette and no primer. You can add them later. Plenty of people never need them.

Which makeup is safest to buy online?

Here’s a framework I’d use. I call it the shade-risk ladder. It ranks makeup by how badly a wrong shade can ruin your purchase when you can’t swatch it first.

RiskItemsWhy
LowLip colour, mascara, soft blushA slightly different shade still looks fine
MediumFace powderA translucent or near-skin shade is forgiving
HighConcealer, foundationA mismatch shows at once, especially at the jaw

This ranking is my own reasoning, not a published rule. It does explain why I’d start at the bottom of the ladder and climb slowly. When you’re ready for the top rung, our guide to choosing a foundation shade online walks you through undertone and daylight testing.

What is the three-round buying plan?

Don’t buy everything at once. Buy in rounds, and let your own habits decide what comes next.

  1. Round 1: a lip colour and a mascara. Use them for two or three weeks.
  2. Round 2: a face powder and a blush, once you know what you actually wear.
  3. Round 3: a concealer, only after you’ve read a shade guide and found your undertone.

This plan has a second benefit. Because your skin sees one or two new products at a time, you’ll know exactly which one caused a problem if your skin reacts. Our guide to how to patch test skincare also works for makeup that stays on your face for hours.

What should you skip at the start?

Skipping saves more money than any discount. For a first kit, I’d leave out these:

  • Big palettes with many shades. You’ll use two and ignore the rest.
  • “20-piece” sets, because you can’t see the shade or ingredients of each item.
  • Three lipsticks in nearly the same colour.
  • A second mascara, since eye products have a short life.
  • Anything with no ingredient list, batch code or clear label. Our guide to identifying original cosmetics in Pakistan explains why.

How do you keep your makeup clean and safe?

A starter kit is only useful if it stays safe to use. Three habits cover most of it.

Replace mascara on time. The US Food and Drug Administration notes that some industry experts suggest replacing mascara about three months after purchase. Write the date on the tube with a marker.

Don’t share. The FDA’s advice on using cosmetics safely is to never share makeup, and to throw away a product if its colour or smell changes.

Keep it cool. Heat is hard on makeup. Avoid sunny windowsills, parked cars and hot shelves, especially in Pakistan’s summer.

Does Pakistan’s weather change what you should buy?

Yes, a little. In hot, humid weather, a lighter finish usually feels better than a heavy one. The American Academy of Dermatology says that for oily skin, matte products can help reduce shine. That’s one reason a face powder earns its place in a starter kit.

Cash on delivery helps too, because you see the parcel before you pay. Check the seal, look at the label, and message the seller the same day if something looks wrong. Our guide to the best beauty products to buy online has a full parcel checklist.

FAQs about the makeup starter kit

What should be in a makeup starter kit?

Five items are enough: a lip colour, mascara, a face powder, a blush and a concealer. Start with the lip colour and mascara, because a wrong shade matters least there. Add the shade-sensitive products later.

Do beginners need foundation?

No. Many people do well with a lip colour, mascara, powder and blush. If you decide you want foundation, buy it last, and follow a shade guide first. A mismatch is easy to see.

What makeup should you buy first?

A lip colour and a mascara. They’re simple to use, and a slightly wrong shade still looks fine. Use them for a few weeks before you add more.

How can you avoid the wrong shade when buying makeup online?

Start with low-risk items. For base products, work out your undertone, ask the seller for a daylight swatch photo, and test the product along your jawline when it arrives. Never choose from a product photo alone.

How long does makeup last?

It depends on the product. Eye products wear out fastest, and some industry experts suggest replacing mascara about three months after purchase. For any product, throw it away if the colour or smell changes.

Is it better to buy a makeup kit or individual products?

Individual products are usually the better choice for a beginner. You can pick each shade yourself and you avoid paying for items you won’t use. A ready-made kit can work if you can see every shade and the ingredient list first.


Soft makeup brushes and a sponge on cream silk beside a bowl of water and a rose petal, clean makeup brushes guide

Clean Makeup Brushes

Quick answer: Clean makeup brushes every 7 to 10 days, as the American Academy of Dermatology advises. Wash sponges more often, because they hold wet product. Brushes used near your eyes need extra care. Never share any of them, and let everything dry fully before you put it away.

When did you last wash your makeup brush? If you had to think about it, that’s your answer.

Most of us treat brushes and sponges as permanent. We wash our faces twice a day, then dab foundation on with a tool that hasn’t seen water in a month. This guide gives you a simple schedule, a few honest warnings, and a drying plan that works in Pakistan’s humid weather.

How often should you clean makeup brushes?

The American Academy of Dermatology recommends washing brushes every 7 to 10 days. Its reason is simple: brushes collect product residue, dirt and oil. Dermatologists also warn that they can hold bacteria, which may lead to breakouts, rashes or, in some cases, infections.

That’s the official number. However, you’ll find other numbers online, and they don’t all agree. The Cleveland Clinic says brushes used with dry products, such as powder and blush, can be washed about once a month, while eye-area brushes need regular washing because eyes are more prone to infection. Geisinger agrees on 7 to 10 days for brushes, but says tools that apply liquid makeup, like sponges, need spot cleaning after every use.

So who’s right? All of them, in a way. The advice changes with what the tool touches.

What is the wet-or-dry rule?

Here’s the rule I’d use. The wetter the product, and the closer to your eyes, the more often you wash.

ToolHow often I’d wash itWhy
Foundation, concealer and cream brushesEvery 7 daysWet formulas hold more residue
Powder and blush brushesEvery 7 to 10 daysThis is the AAD range. Once a month is the least some clinics accept
Eye brushesEvery 7 days, or sooner if product builds upEyes are more prone to infection
Makeup spongesSpot clean after each use, deep wash weeklyThey soak up liquid product

The 7 to 10 days and the “after every use” advice come from the sources above. The weekly deep wash for sponges is my own habit, not a rule.

How do you know your tools are overdue?

You don’t have to count days. Look for these signs:

  • Visible colour or hard clumps in the bristles or sponge.
  • Bristles that feel stiff, sticky or oily.
  • A smell, even a faint one.
  • A sponge that is stained, crumbling or torn.

If you notice any of these, wash the tool today. If a sponge still smells or crumbles after washing, replace it.

How do you wash makeup brushes step by step?

You don’t need a special product. A little mild soap or shampoo and lukewarm water do the job. These steps follow the AAD’s advice:

  1. Rinse the tips of the brush under lukewarm running water to remove leftover makeup.
  2. Add a drop of mild soap or shampoo and gently work it through the bristles with your fingers.
  3. Rinse until the water runs clear. Keep the water on the bristles, not the base of the handle.
  4. Squeeze out extra moisture with a clean, dry paper towel.
  5. Lay the brush flat on a towel, with the tips hanging off the edge of the counter.

Don’t dry brushes standing upright in a cup. The AAD explains that water runs down the brush and can loosen the glue that holds the head to the handle.

For sponges, the steps are similar. Wet the sponge, work soap into it until the colour comes out, rinse well and squeeze it gently. Then let it dry somewhere with air around it.

How do you dry them in Pakistan’s humid weather?

This is where most guides stop, and where humid weather causes trouble. Damp bristles take longer to dry when the air is sticky. A brush zipped into a pouch while still damp is a poor idea, because it stays wet in a closed space.

Here’s what I’d do. Wash brushes in the morning, so they have the whole day to dry. Lay them flat near an open window or under a fan, away from direct sun. Don’t put anything back in a bag until the bristles feel completely dry. Then store the tools in a clean, dry, covered holder, so dust doesn’t settle on them.

If humid weather also affects your skin, our guide to skincare for humid weather covers what to change in your routine.

Which mistakes should you avoid?

Cleaning tools is easy. These are the common slip-ups:

  • Sharing brushes or sponges with friends or family. The AAD says never to share makeup brushes, and the US Food and Drug Administration also advises not sharing makeup.
  • Drying brushes upright.
  • Washing only the tips of eye brushes and never the rest.
  • Using a damp tool on skin that’s already irritated.
  • Keeping a sponge that smells, even after washing.

If you suspect your makeup or your tools are causing breakouts or irritation, see a dermatologist. Also, patch test any new product before you blame the brush.

FAQs about cleaning makeup brushes

How often should you clean makeup brushes?

The American Academy of Dermatology recommends every 7 to 10 days. Brushes used with wet products, or near your eyes, deserve the shorter end of that range. Dry powder brushes can sometimes stretch longer, but regular washing is the safer habit.

How often should you wash makeup sponges?

Sponges soak up liquid product, so they need more attention than brushes. Geisinger advises spot cleaning after every use. I’d also give them a deep wash once a week. Replace a sponge that smells or crumbles even after washing.

Do you need to wash brushes every day?

Not for most brushes. The AAD advice is 7 to 10 days. Sponges are the exception, because they absorb wet product and hold moisture.

What should you use to wash makeup brushes?

Lukewarm water and a little mild soap or shampoo work well. Rinse until the water runs clear, and keep the water away from the base of the handle.

How should you dry makeup brushes?

Squeeze out extra moisture with a clean paper towel, then lay the brush flat with its tips hanging off the edge of a counter. Don’t dry it upright in a container. In humid weather, give it plenty of time and don’t store it until it feels dry.

Can dirty makeup brushes cause breakouts or infections?

According to the AAD, dirty brushes can collect bacteria, which may contribute to breakouts, rashes and, in some cases, infections. If you notice irritation that keeps returning, see a dermatologist.

Foundation bottle and soft sponge on cream silk with falling rose petals, how to choose foundation shade online

Choose Foundation Shade Online: A Pakistan Guide

Quick answer: To choose foundation shade online, work out your undertone (warm, cool or neutral) and depth first. Then match them to the shade names, ask the seller for a daylight swatch photo if they have one, and test the product along your jawline in daylight when it arrives. Never choose from a product photo alone.

Learning to choose foundation shade online saves you money and frustration. A wrong shade is a quick way to waste a bottle. The good news is that a few simple checks improve your odds a lot.

This guide uses plain steps you can do at home. It also covers a method I like, the reference-shade method, and explains how Pakistan’s heat and seasons can change the way a shade looks.

Why is it hard to choose foundation shade online?

In a shop, you swatch a shade, step outside and look at it in daylight. Online, you can’t do any of that before you pay. Three things get in the way.

  • Screens: your phone may show a shade lighter, darker or pinker than the real product.
  • Lighting: product photos are usually taken in studio light, not in your room.
  • Names: there is no universal shade chart, so one brand’s “Beige” is another brand’s “Sand”.

So the goal isn’t a perfect guess. The goal is to narrow your choice, then test properly when the parcel arrives.

How do you find your undertone at home?

Undertone is the subtle colour under the surface of your skin. It stays the same, even when your tan changes. Most guides group it as warm, cool or neutral.

Here is a simple home check. Stand near a window in daylight and look at the veins on the inside of your wrist. Greenish veins often point to a warm undertone. Bluish or purple veins often point to a cool one. If you can’t tell, you may be neutral.

However, this check isn’t perfect. Lighting, a tan and natural redness can all fool you. Treat it as a starting point, not a verdict.

For depth, which means how light or dark you are, look at your jawline and neck. Don’t use your hands or a sun-tanned cheek. Those can be a different colour from the rest of your face.

What is the reference-shade method?

This is the method I’d use. If you already own a foundation, concealer or compact powder that matched you well, that product is your reference. Write down its brand and its shade name.

Then open the shade chart of the new foundation. Pick the closest depth and the same undertone. If you have no reference product, use the undertone check above and choose the middle of your depth range.

That’s how I choose foundation shade online: by comparing against something real instead of guessing from a screen. It also helps the seller. A message like “I wear this shade in another brand and I’m warm-toned” is much easier to answer than “I’m medium”. You can contact us with that kind of detail before you order.

How do you read foundation shade names?

Many ranges use numbers for depth and letters for undertone. For example, W often means warm, C means cool and N means neutral. However, this isn’t a universal rule. Each brand sets its own system, so read the brand’s chart before you trust a letter.

Also read the words on the product page, such as “light”, “medium” or “golden”. If a page shows only photos and no shade details, I’d skip it. On our face makeup pages, check the shade and finish details before you order.

How should you test a foundation when it arrives?

When you choose foundation shade online, the real test happens at home. Do it properly, and you’ll know within twenty minutes.

  1. Check the product first. The US Food and Drug Administration advises you to throw away cosmetics if the colour or smell changes.
  2. Wash your hands and use clean, dry skin.
  3. Go near a window or step outside. Bathroom light often distorts colour.
  4. Apply a short stripe along your jawline and blend it down toward your neck.
  5. Wait 15 to 20 minutes. Some formulas look different once they dry.
  6. Look again in daylight. The right shade seems to disappear into your skin and neck.

Foundation stays on your skin for hours, so it’s also worth reading our guide on how to patch test skincare and makeup before you wear a new product on your whole face.

Does Pakistan’s weather change your foundation shade?

It can. Your skin colour isn’t fixed through the year. A summer tan can make last winter’s shade look pale, so match your skin as it is now, not as it looked in an old wedding photo.

Heat and humidity matter too. Even if you choose foundation shade online carefully, a hot day can make a formula look shinier or different after a few hours. So wear it on a normal day before you wear it to an event. Then check the colour again at the end of the day.

Keep your foundation away from direct sun and hot shelves as well. Heat can change makeup before you even finish the bottle.

What mistakes lead to the wrong foundation shade?

Most people who choose foundation shade online make the same few mistakes. Here are the common ones:

  • Matching the shade on your hand instead of your jawline and neck.
  • Choosing from a model’s photo, which shows the lighting, not your skin.
  • Ignoring undertone and thinking only about light versus dark.
  • Going a shade lighter on purpose to look fairer. In my opinion, that usually leaves a visible line at the jaw. Match your skin, then let lighting and powder do the rest.
  • Sharing makeup or letting others dip into your bottle. The FDA’s advice is simply do not share makeup.

If you also want a lip colour that suits your skin, our guide to how to choose a lipstick shade works the same way.

FAQs about how to choose foundation shade online

How do I choose foundation shade online if I’ve never worn foundation?

Start with your undertone and depth, checked near a window in daylight. Then begin with a more forgiving product, such as a compact powder or a light tinted product, before a full-coverage foundation. Test it along your jawline when it arrives.

Should I pick a lighter or darker shade if I’m unsure?

Pick the shade that matches your neck and jawline in daylight. If you’re stuck between two, choose the one that looks closer to your neck. Avoid going lighter on purpose, because that usually leaves a visible line.

Is the vein test for undertone accurate?

It’s a useful starting point, but it isn’t perfect. Lighting, a tan and redness in the skin can change what you see. Use it together with the reference-shade method, and confirm with a jawline test in daylight.

How do I know if a foundation oxidises?

Some foundations change colour as they dry or mix with skin oils. Wait 15 to 20 minutes after applying a stripe. If it has turned darker or more orange, it probably isn’t the right shade or formula for you.

Can I return a foundation if the shade is wrong?

Return rules differ from shop to shop, and opened makeup is often treated differently from unopened items. Read the seller’s return policy before you order. If the shade is clearly wrong, message the seller as soon as the parcel arrives, with photos.

Does my foundation shade change during the year?

For many people, yes. A summer tan can darken your skin, and the shade you used in winter may look too light. Your undertone stays the same, but your depth can shift, so recheck your match each season.